The Beginner Guide to Zion National Park

Zion National Park is an easy place to love.
There are towering peaks on all sides.
Beautiful red rocks throughout the canyon.
And some of the most epic views and hikes in any national park.
We’ve cobbled together this beginner guide to Zion. Things we did. Things we wish we would have done. And things we’ll do next time.
Let’s dive into Zion National Park for Beginners!
Notes from the Newbies

Katie
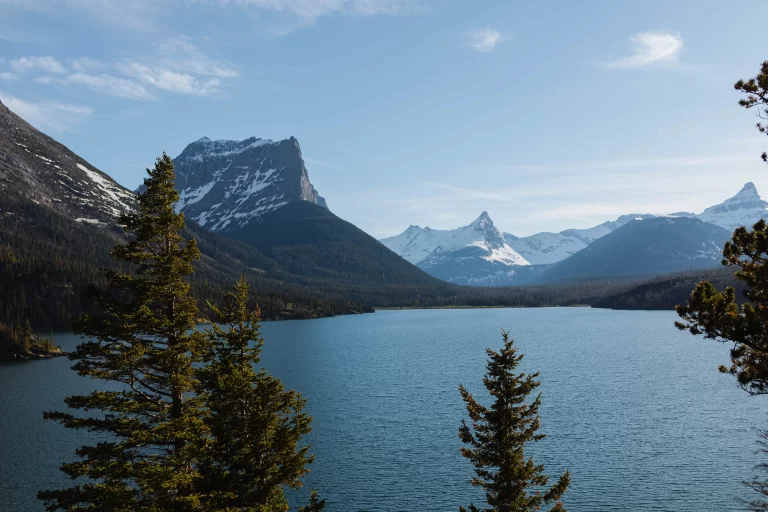
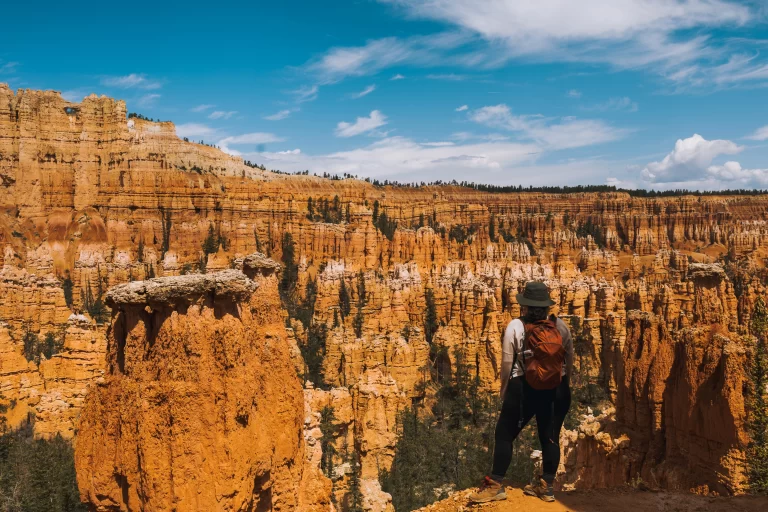
I love Zion because it’s one of the most GRAND parks we’ve ever visited. The cliffs rise all around you when you descend into the canyon. My favorite spot was the Zion Canyon Overlook Trail – it’s a view I’ll probably never forget.
Gus
Simply put – Zion is epic! Apart from some insane hikes and spectacular views, it’s one of the most well run parks we’ve ever visited. From the simple shuttle to the friendly rangers, visiting Zion National Park is easy – especially for beginners!
Zion National Park Basics
| Date Established | 1919 |
| Annual Visitors | 4,692,417 |
| Rank in Popularity (by visitors) | 3rd |
| Our favorite Hike | Zion Canyon Overlook |
| #1 Reason to Visit | Zion Canyon |
| Highest Visited Month | June (564,036 visitors) |
| Lowest Visited Month | Jan. (114,117 visitors) |
| Best time to Visit | Spring through Early Summer |
| Ideal # of Days to Spend | Three (3) |
| Closest Major Airport | Las Vegas (163 miles) |
Map of Zion National Park
There are two primary sections to the park: Zion Canyon and Kolob Canyons.
Zion Canyon is where all the main attractions, amenities, and resources are.
The Kolob Canyons District sits on the northeast corner, about an hour’s drive from the main section of the park.

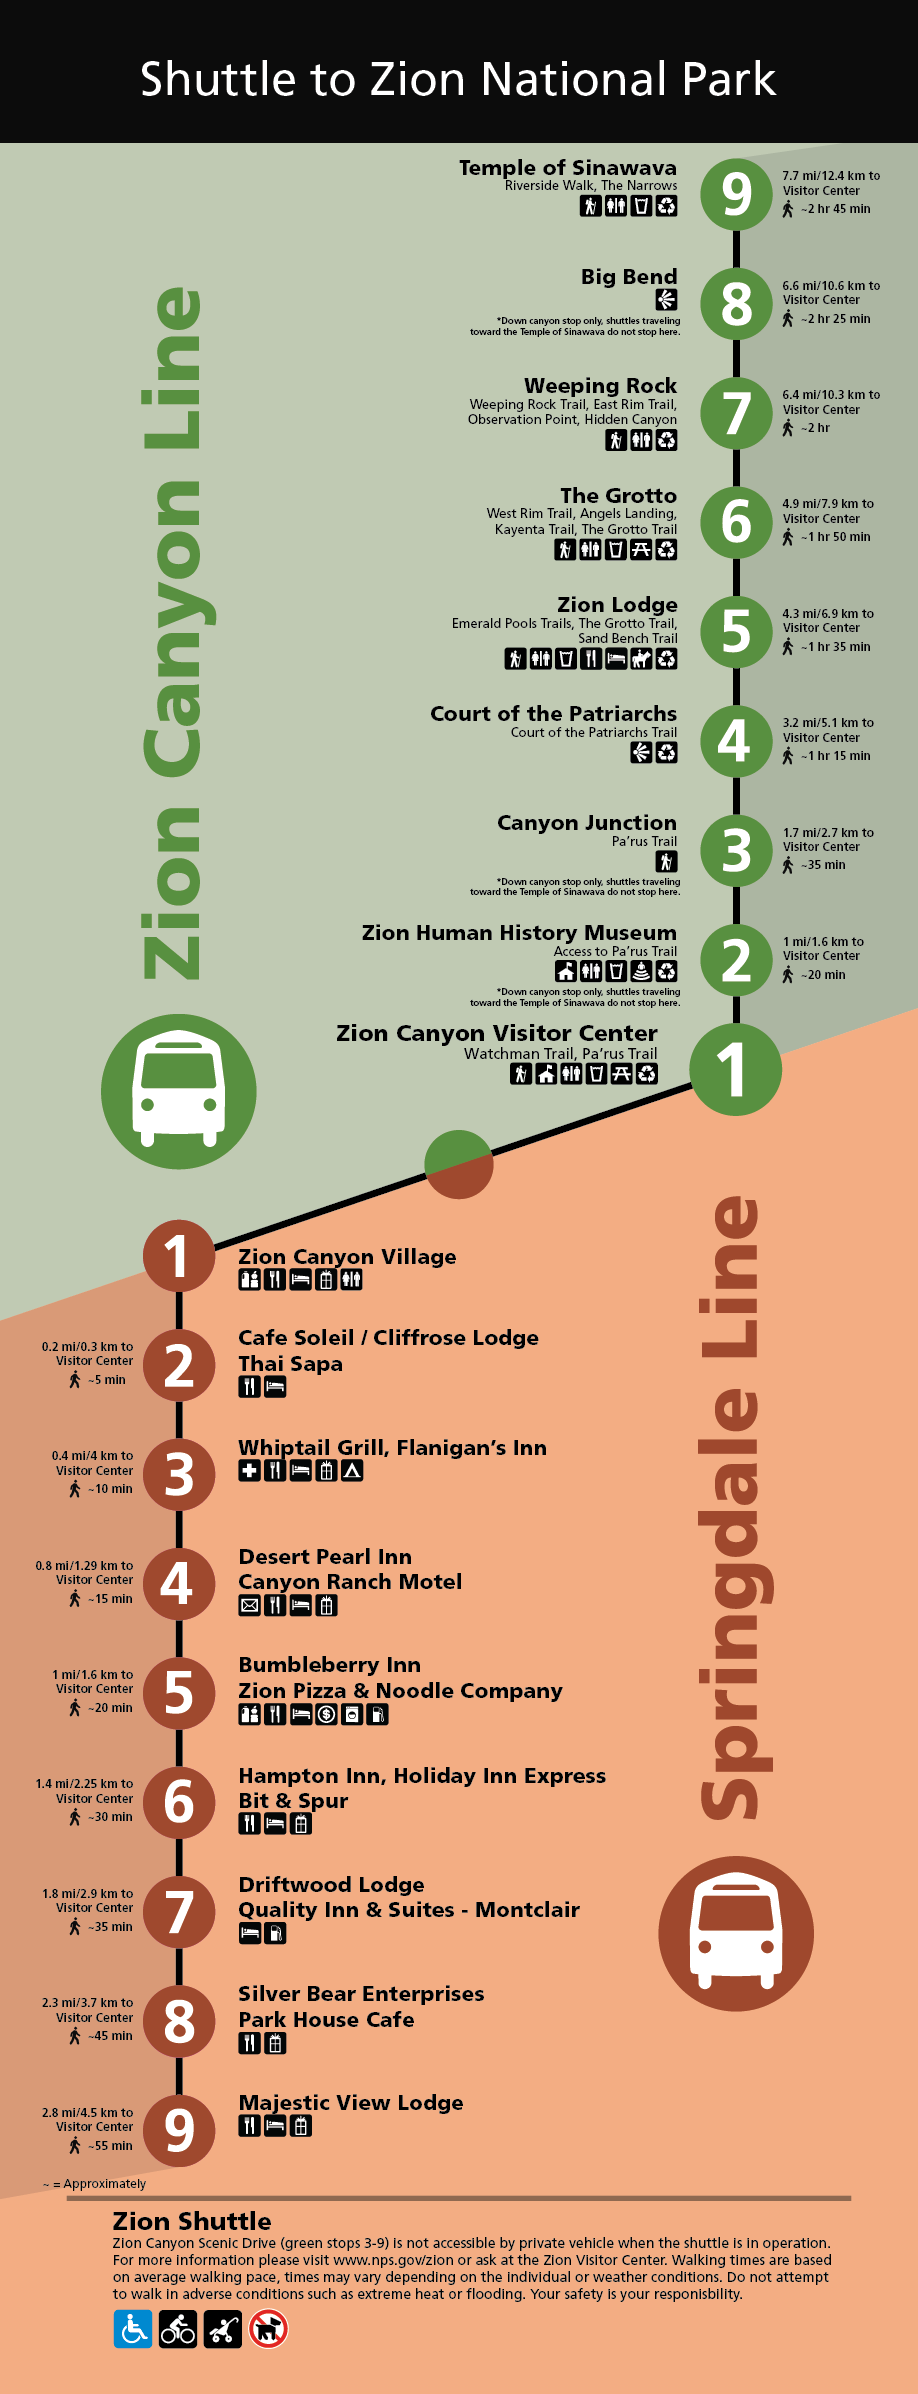
Zion Shuttle
The Zion Shuttle is the best shuttle system we’ve experienced in any park system (and places like Yosemite could take some notes!)
The shuttle runs from outside the park in nearby Springdale, all the way up to the Temple of Sinawava on the north end of Zion Canyon.
It was incredible easy to get to the most popular places within the park.
Generally speaking, the shuttle runs daily from March through December. Always check the NPS website for the most up-to-date information.
Tips Before You Visit Zion National Park
Zion is the 3rd most visited park in the US. Unlike other parks, you need to map out your day, plan for delays, embrace more crowds, and expect to adjust your plans.
Here are our 5 tips for visiting Zion for beginners!
Tip #1: Use the Shuttle (Spring – Fall)
There’s essentially no way to visit Zion without taking the shuttle.
The Zion Canyon Scenic Drive is closed to private vehicles while the shuttle is in operation, meaning the only way to get up to most of the scenic places is via the shuttle!
When you get there early (notice I said when, not if), park your car near the Zion Canyon Visitor Center (just past the park entrance). The shuttle starts here and can take you all the way through the canyon.
Another option is to take advantage of the Springdale Line. Springdale is the little town near Zion National Park. And there is a shuttle that brings visitors inside the park.
There are plenty of parking spaces in Springdale and might be a good option if you’re lodging outside the park!
(map/image of shuttle)
Tip #2: You NEED a Permit to Hike Angels Landing
This might seem obvious to you, but it wasn’t to us.
You need a permit to hike Angels Landing.
This is probably the most iconic hiking trail in Zion. The reason people trek hundreds of miles into the southern Utah wilderness. The hike that folks talk about for years!
… and we missed it.
Oof.
You can enter the seasonal lottery to hike Angels Landing up to 3 months in advance.
If you don’t think far in advance (like us) there are next day lotteries for last minute permits.
We applied 3 times for the next day lottery and… failed.
Don’t be like us.
Think ahead and reserve your spot to hike Angels Landing.
Tip #3: Arrive Early to Secure Parking

Zion was the most crowded of all the Utah Parks. And for good reason:
- It’s closest to a major city (Vegas – 2 hours)
- There are trails for all levels
- And it’s one of the most scenic places in the US
So expect delays and more crowds if you arrive later than 9am.
We arrived at about 8:30am on our first morning and the lot was already filling up.
Next day we arrived closer to 7:30am and it was much less packed.
Even better, the shuttle starts running at 7:00am, so you won’t have to sit around waiting too long.
Get there early. It’ll make your entire day so much better.
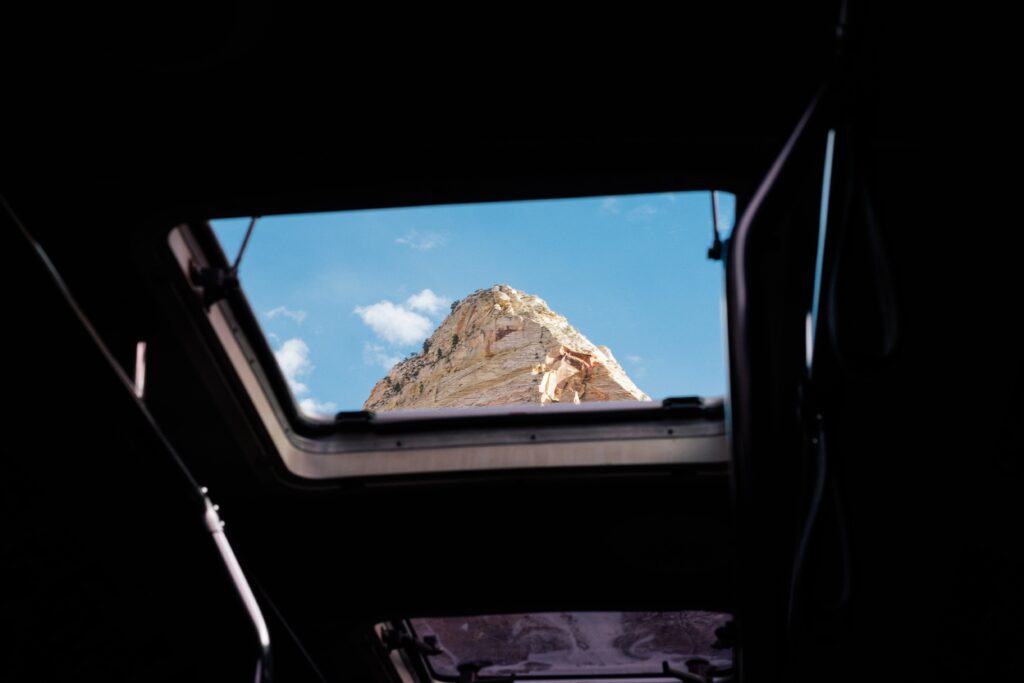
Tip #4: Drive Zion-Mount Carmel Highway
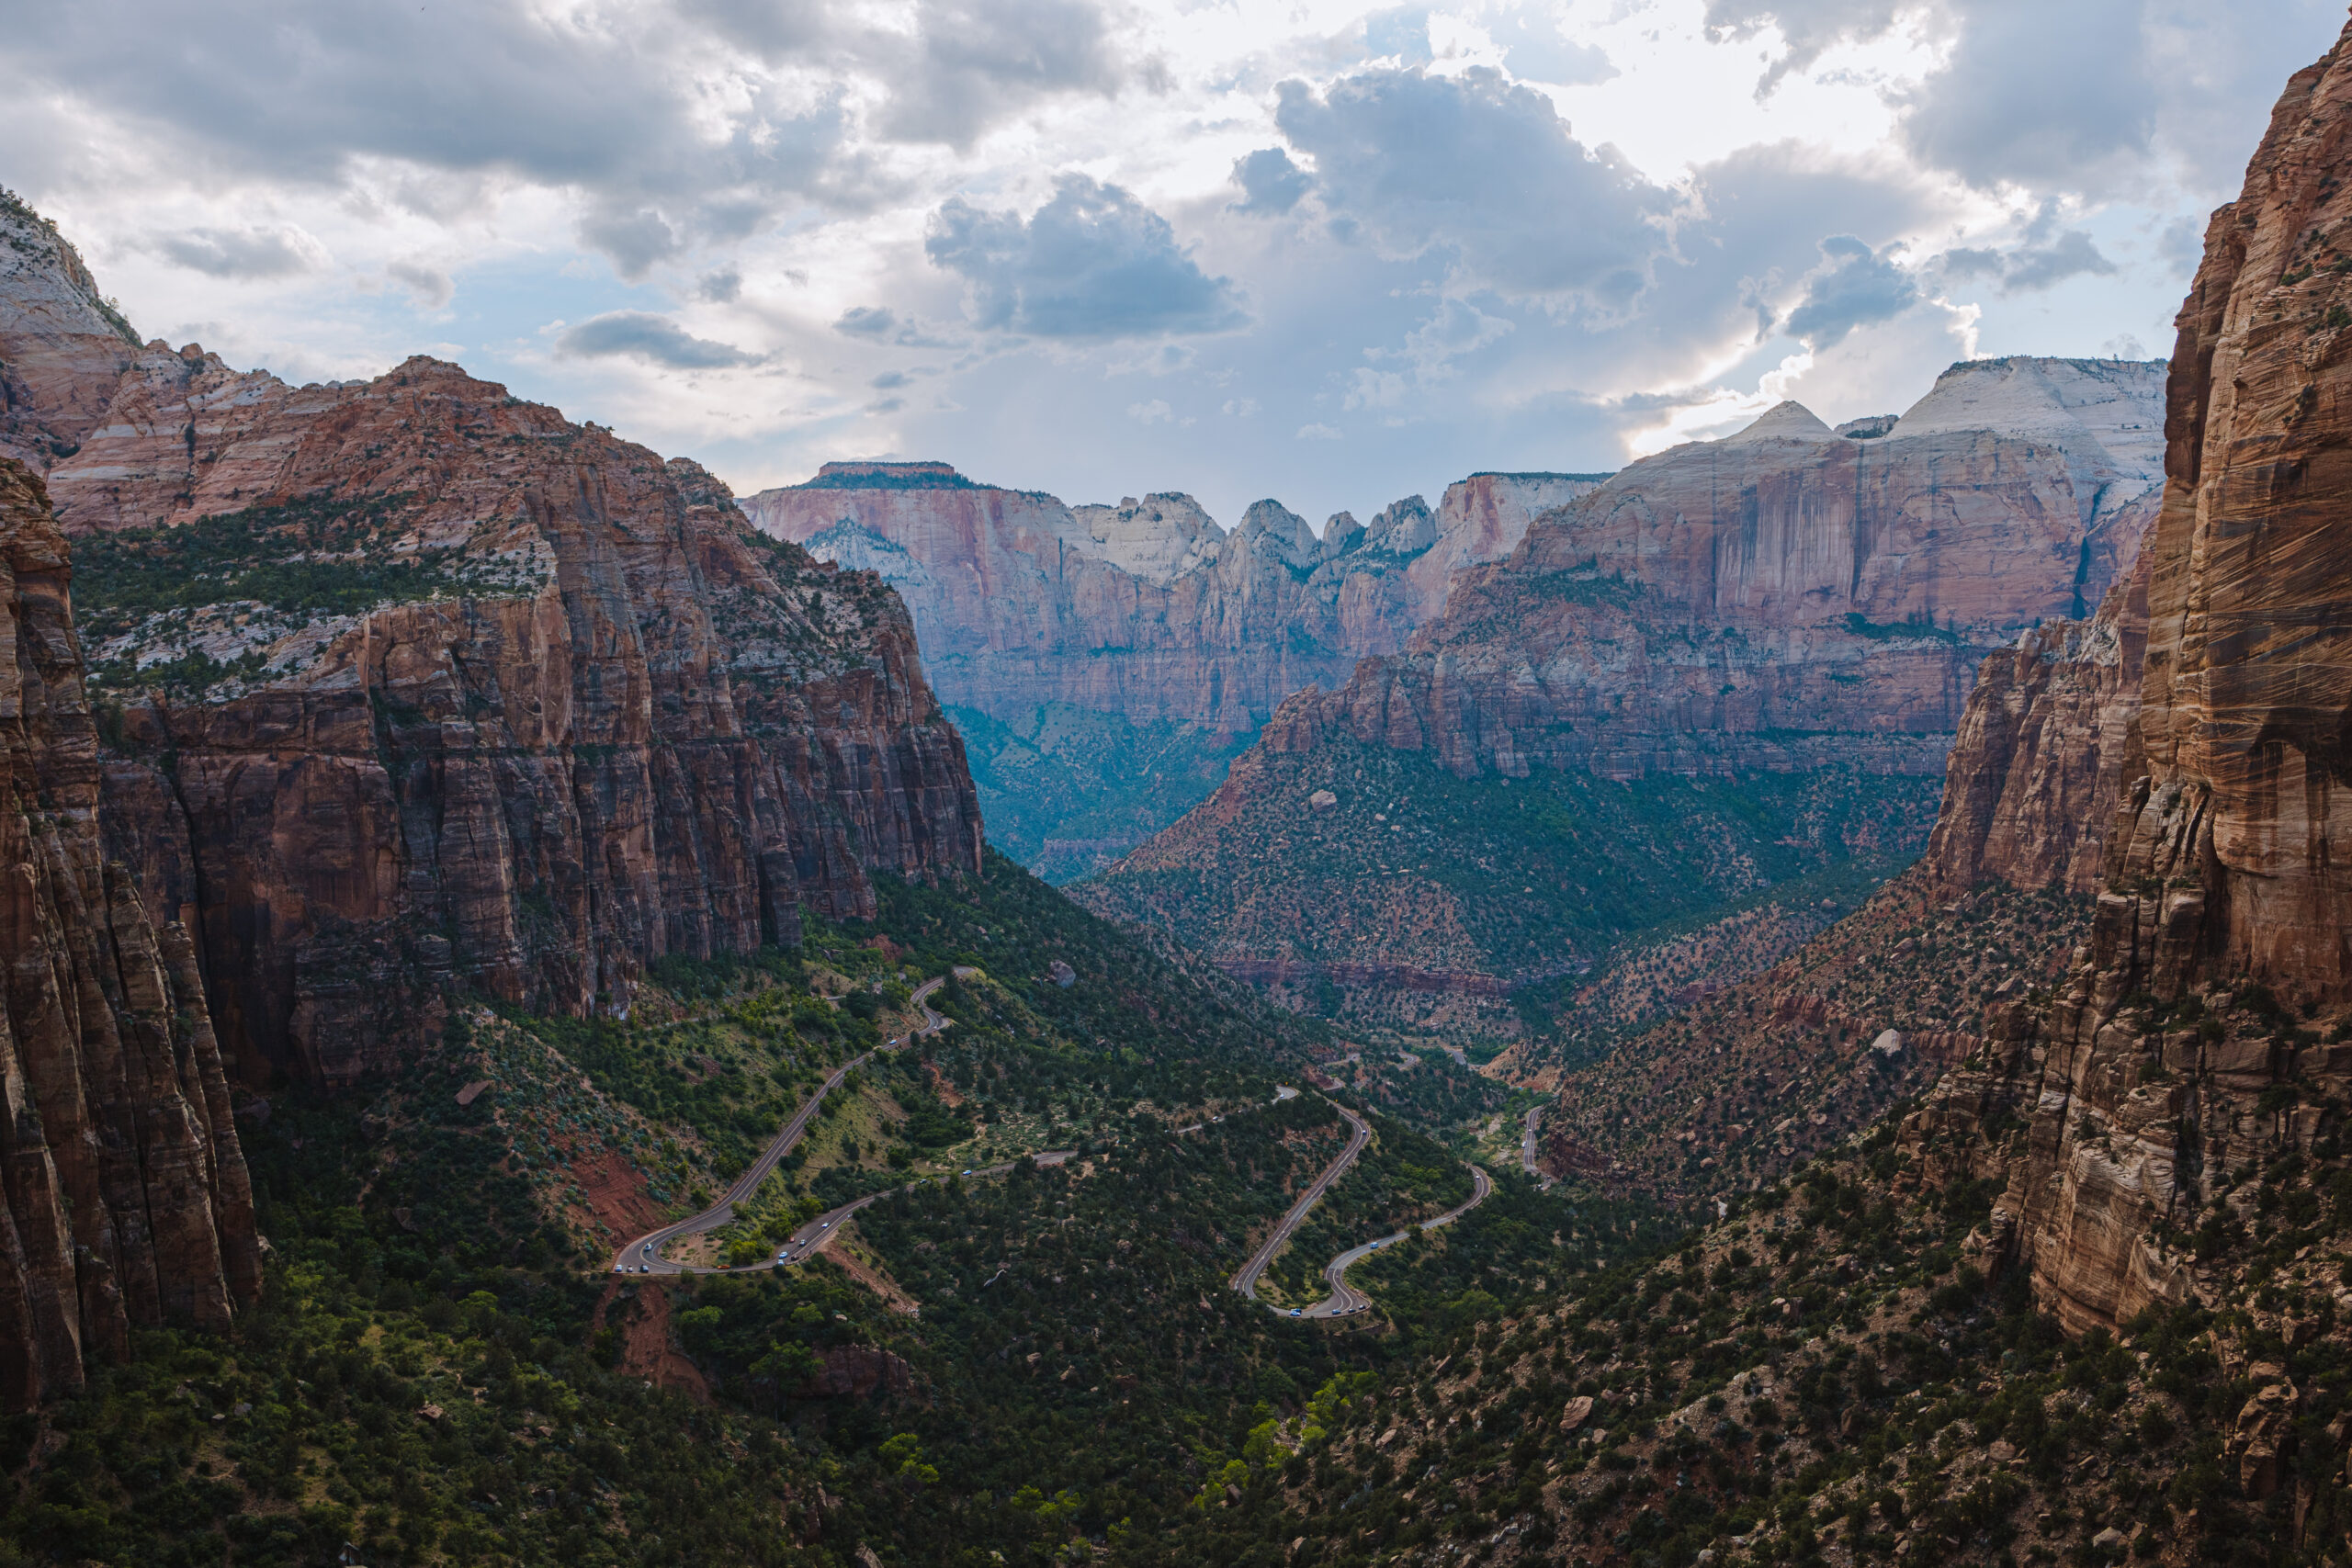
The Zion-Mount Carmel Highway is the most scenic drive you can take within Zion.
This route connects the East Entrance to the South Entrance.
The best part is the Zion-Mount Carmel Tunnel.
This 1.1 mile tunnel was completed in 1930. It brings you from east to west and provides a dramatic entrance into the canyon.
There are also these incredible switchbacks that bring you up/down from the canyon. I especially loved driving it at dusk as it was really interesting to see the car headlights moving back and forth.
It’s a popular area of the park, so please tread carefully.
But do it! It’s a scenic drive you won’t soon forget.
Tip #5: Enjoy Springdale, UT
We always find the little towns that neighbor the parks to be SO interesting.
Springdale is just as unique and cute!
This town has plenty of places to eat, get snacks, refuel, and rest up.
After a long day at Zion, we explored Springdale a bit and enjoyed meandering around and talking to a few locals.
We loved:
- Camp Outpost for its juicy burger (and cool vibes)
- Zion Canyon Coffee (for waking us up in the morning!)
- And Zion Park Gift & Sweet Treats (for the ice cream that hit the spot).
Make some time to enjoy Springdale – it’ll feel so rewarding after a long day of exploring.
Some of our other favorite little towns have been:
- Moab near Arches and Canyonlands
- Ashford near Mount Rainier
- Asheville near the Great Smoky Mountains
- Jackson Hole near the Grand Tetons
- Port Angeles and Forks near Olympic
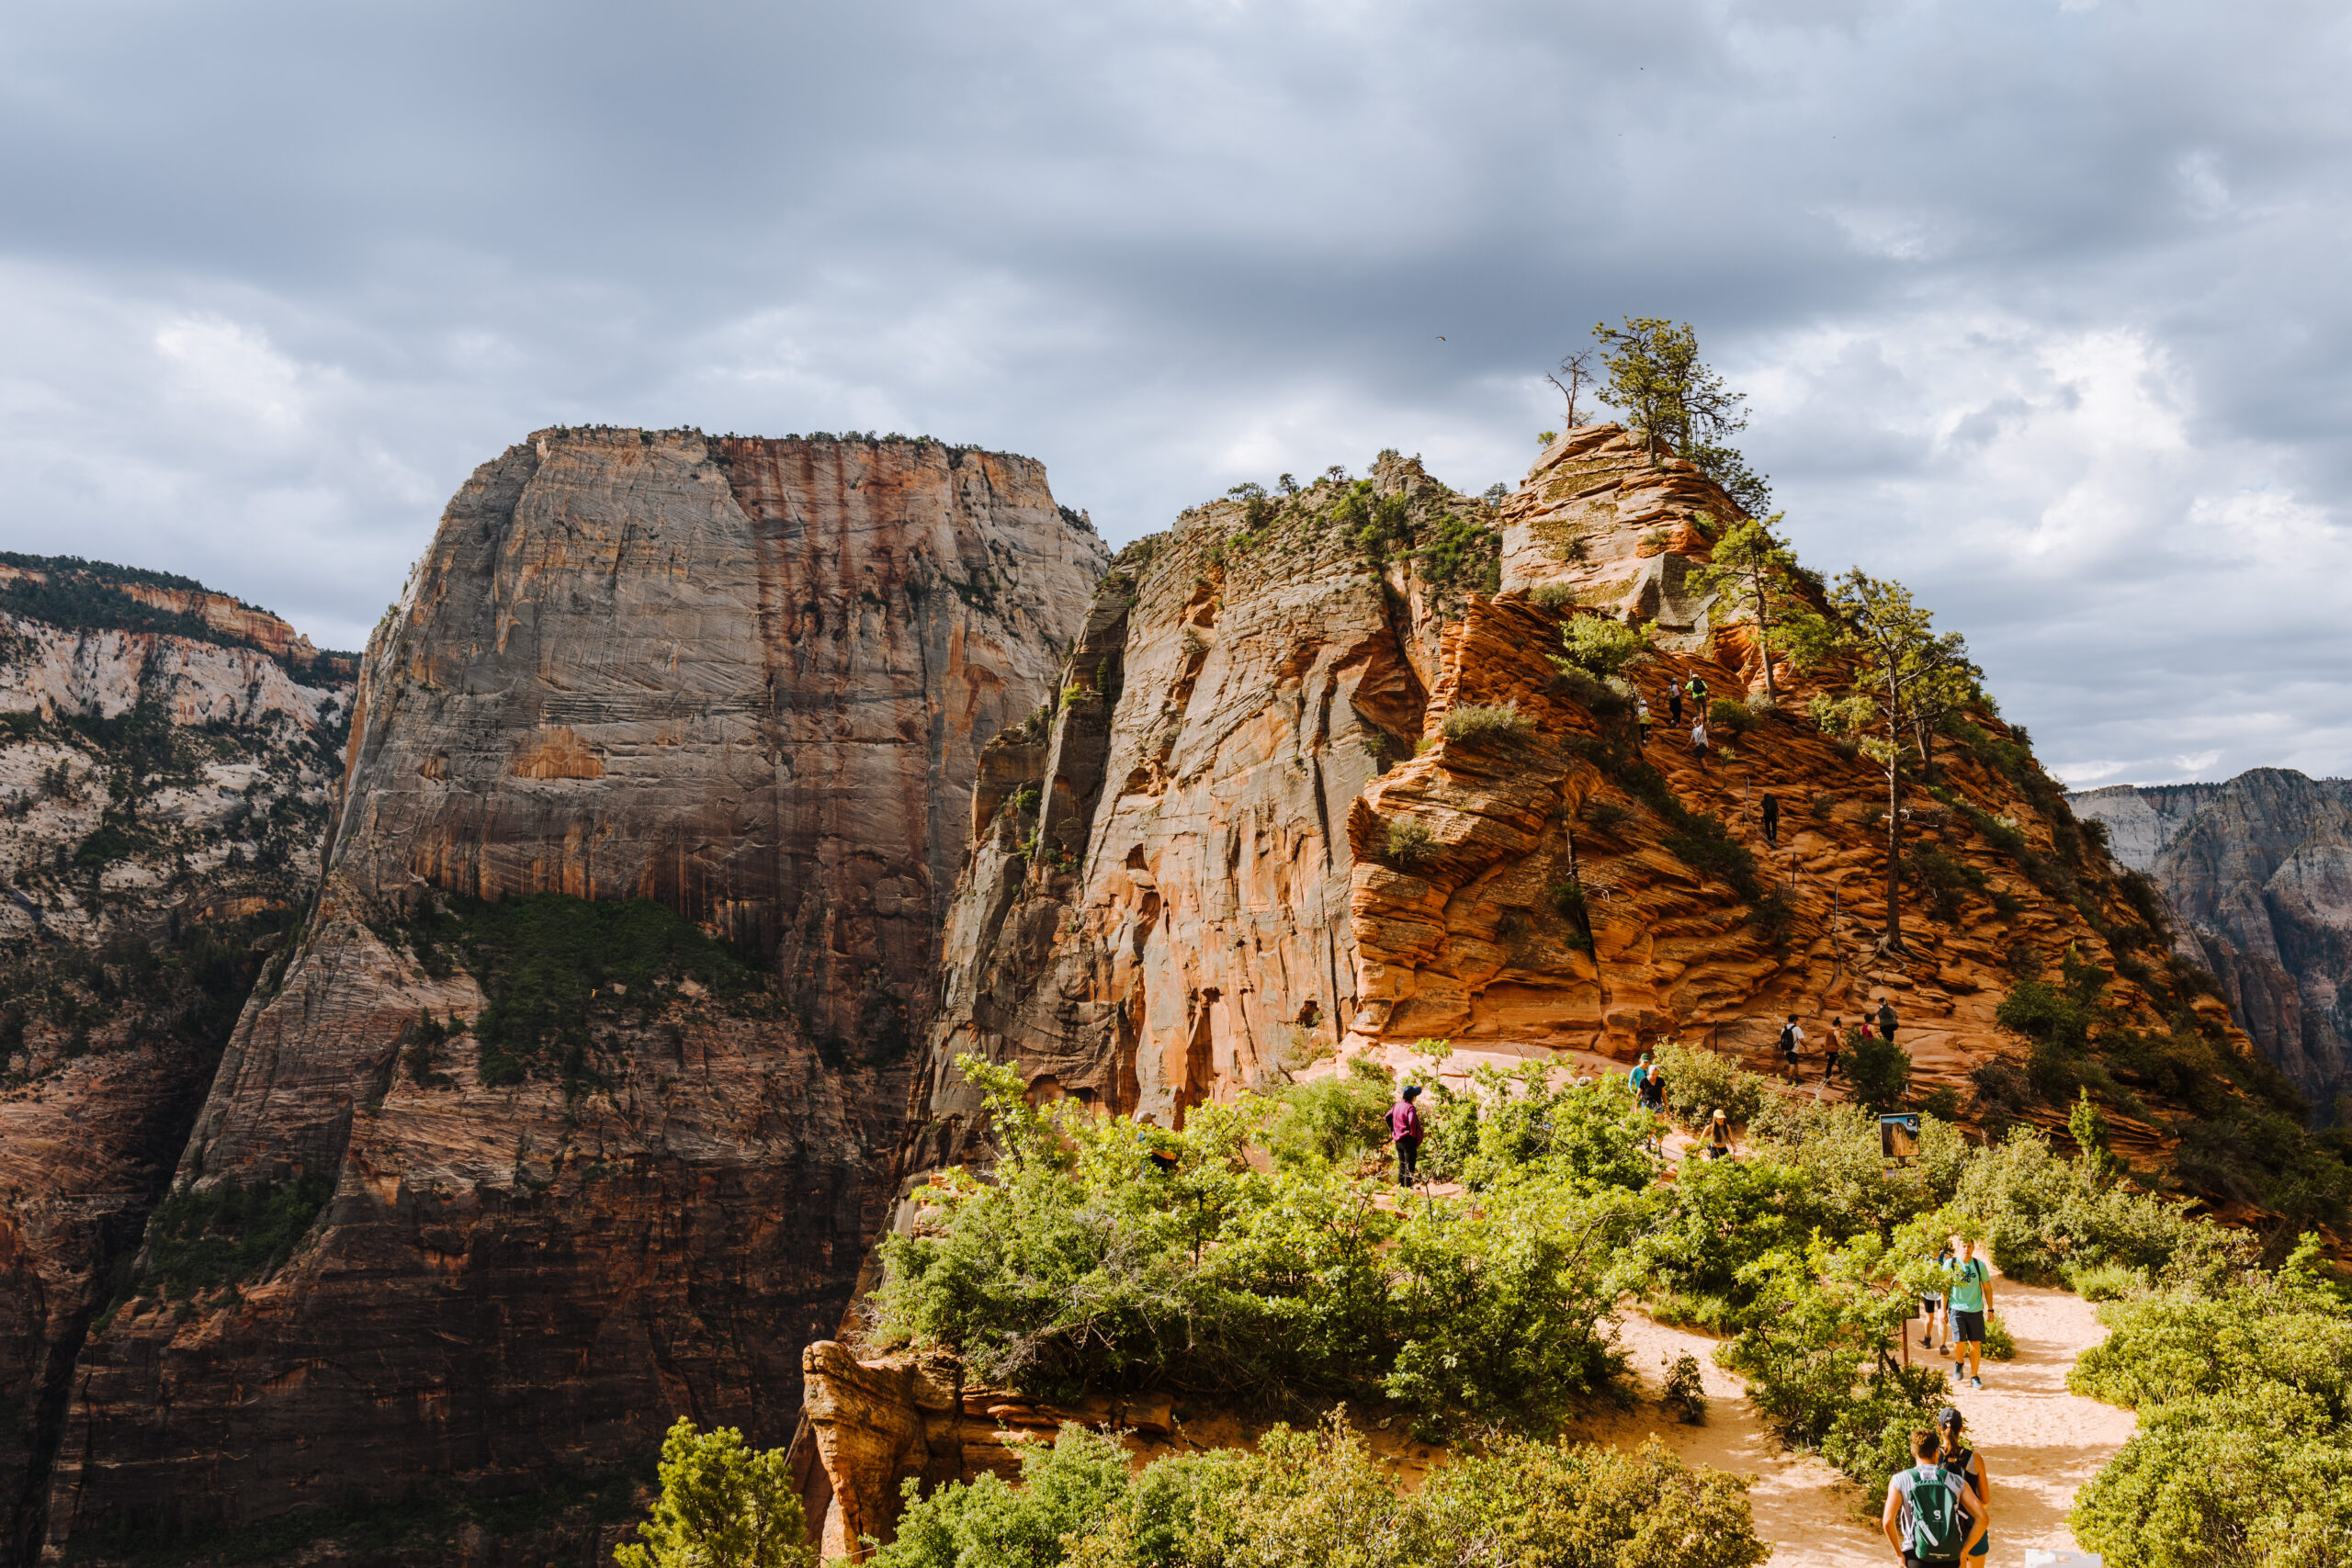
Most Popular Hike at Zion: Angels Landing

Zion’s most popular trail is no doubt Angels Landing.
It became so popular, in fact, that the park service had to implement a permit system in reaction to overcrowding as well as for everyone’s safety.
As we said, we sadly did not get a chance to hike up to Angels Landing.
We made it to Scout Lookout, which is at the foot of Angels and the furthest you can go without a permit.
We were bummed. But it gives us another reason to go back.
Again, don’t do as we did! Plan and make your reservation!
Angels Landing Basics
- Location: Stop 6 The Grotto
- Best Time to Hike: Whenever your permit allows (but as early as possible)
- Length: 5.4 miles round-trip
- Average Time to Complete: 4-6 hours
- Level: Very Challenging
- Elevation Change: 1,488 feet
- Why it’s Popular: probably one of the most iconic views in Zion + the thrill of a challenging hike up the side of a cliff.
Our Experience Hiking Angels Landing (almost)

Keyword here is almost.
We went all the way up to Scout Lookout at the base of Angels Landing.
I think the most challenging part is actually getting up to Scout Lookout. There are various switchbacks along the way and the elevation change is intense.
The most challenging (and most fun) part of the hike was an area called Walter’s Wiggles – a steep set of switchbacks leading up to the base of Angels Landing.
Here you’ll find dozens of people hunched over and catching their breath (maybe it was just us!)
At the base there is a restroom and you will see lots of people mentally preparing for the climb up to Angels Landing.
The most famous feature are the chains you need to hang on to as you scale the side of the cliff – we can’t wait to go back and try it out!
Something cool that happened while up there was seeing someone give away their permit to another person. It was a sweet moment. The people shared hugs and excitement and climbed up together to Angels Landing.
Jealous that didn’t happen for us.
But super excited for the guy who got it!
Best Hikes in Zion (+ Easy Zion Hikes)
Thankfully, there are plenty of other hikes in Zion that are equally as stunning. The best part is there are hikes for folks of all levels. Here are a few of our favorites!
Riverside Walk (+ The Narrows)

The Riverside Walk trail starts at the last stop of the Shuttle: Stop 9 at the Temple of Sinawava.
This trail is relatively flat, 2.2 miles round-trip, and it follows the Virgin River. Most of the trail is accessible, except for the last 0.4 miles, which is no longer wheelchair accessible.
While you walk along this trail, you’ll feel like you are hugging the tall canyon walls. They rise all around you and are stunning.
The Riverside Walk leads you to the entrance of The Narrows – another iconic hike in Zion.
Sadly, we did not get to hike the Narrows either. The water was too high while we were there.
The Narrows is known for hiking in the river through the narrow canyon walls. It’s as scenic as it gets in any park – bummed we missed it.
Watchman Trail
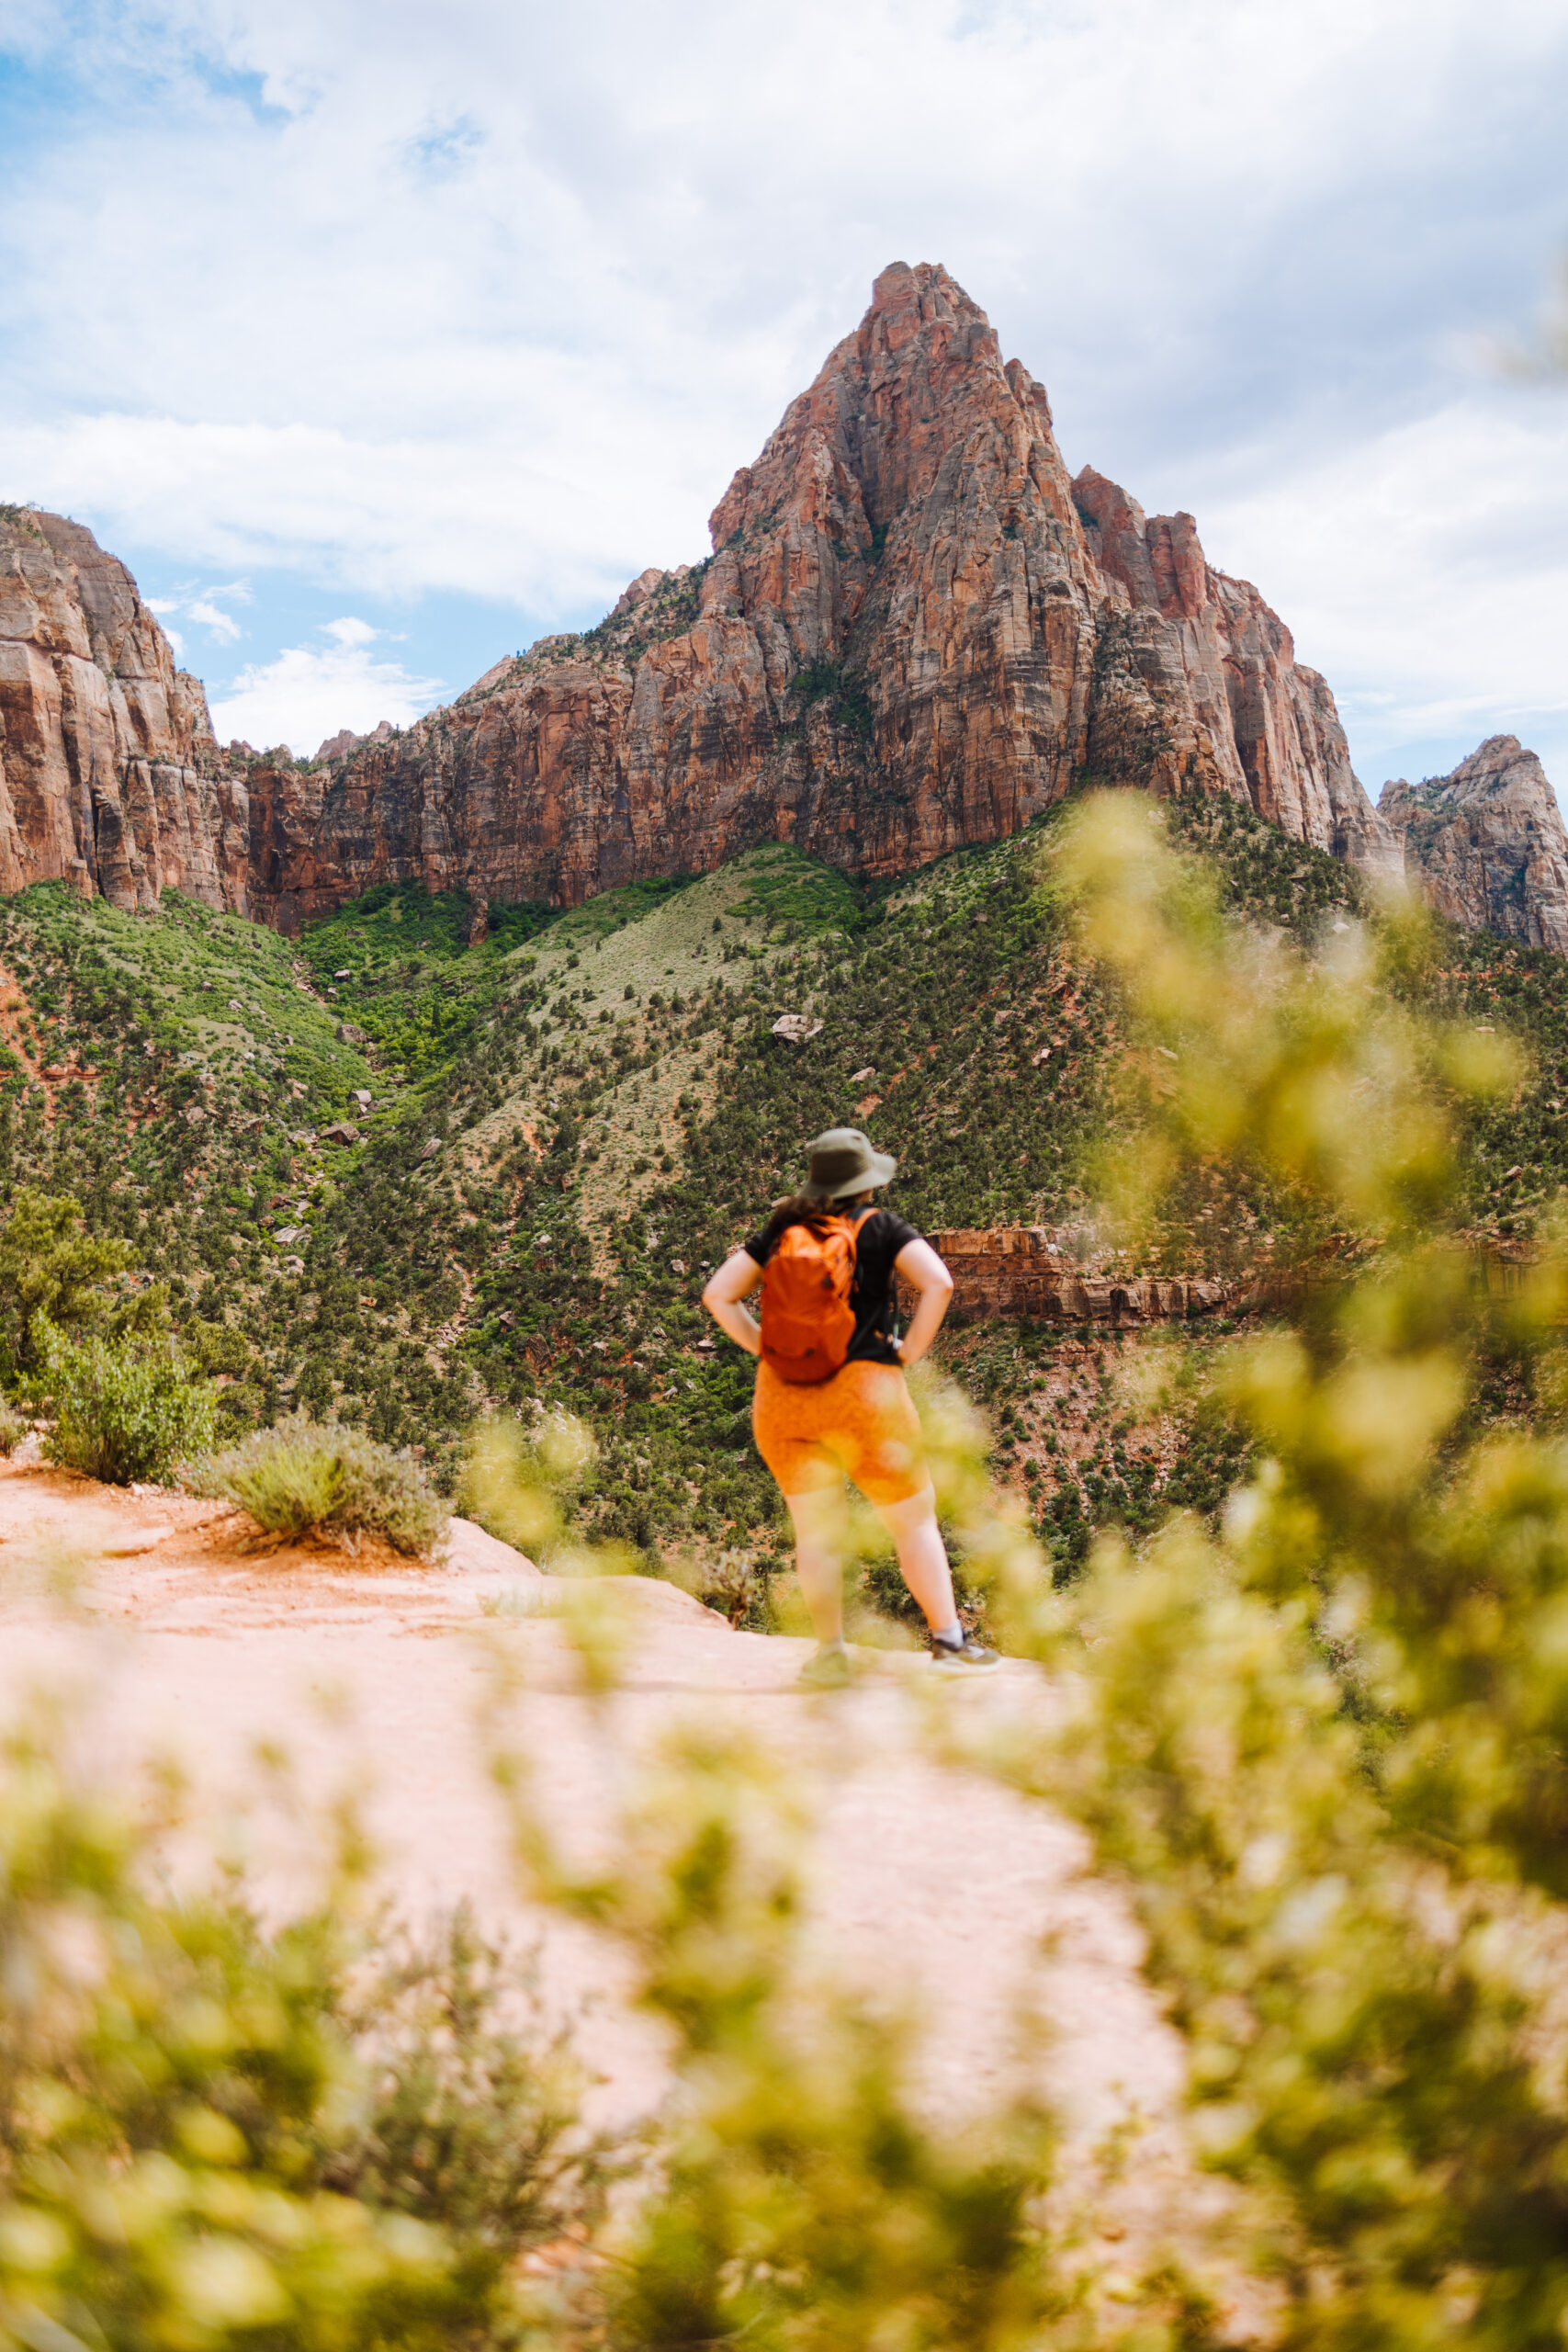
This was probably our favorite hike at Zion!
You can find the Watchman Trail Trailhead just north of the Visitor Center.
You’ll start by hiking along the Virgin River until you turn east and head toward the canyon walls.
The hike itself is about 3.1 miles round trip with a 636 foot elevation change.
We’d rate this hike as moderately challenging as there are various switchbacks and sparse tree coverage from the sun.
At the top of the trail is a short loop that gives you 360º views of the area. It was a bit hard to find and follow, but if there are other hikers in the area just ask them.
The best part of this hike are the sweeping views of the canyon walls. Below is one of my favorite pictures from our trip.

Emerald Pools Trail
The Emerald Pools Trail starts up at Shuttle Stop 5 for Zion Lodge. But you can also connect to it via the Kayenta Trail from Shuttle Stop 6 for The Grotto.
There are three different lengths:
- Lower Emerald Pools
- Middle Emerald Pools
- Upper Emerald Pools

It can be a bit confusing to find your way around, but the simple map below should help.
The hike to Lower Emerald Pools is relatively easy. It’s about 1.2 miles round-trip.
Hiking to the Upper Emerald Pools is a bit more challenging, closer to 2+ miles round-trip.
We made our way to the Upper pools area and finished at a beautiful waterfall. Once up there, you are able to climb your way around the rocks and water. Find a nice place to sit and take in the falls.
It was fairly full when we hiked (mid-day). But I don’t see a way around this since you will want to do other hikes early in the morning.
Parts of the hike – especially to the lower pools – were very crowded. Even the upper pools were crowded when we arrived.
So be prepared for lots of people.
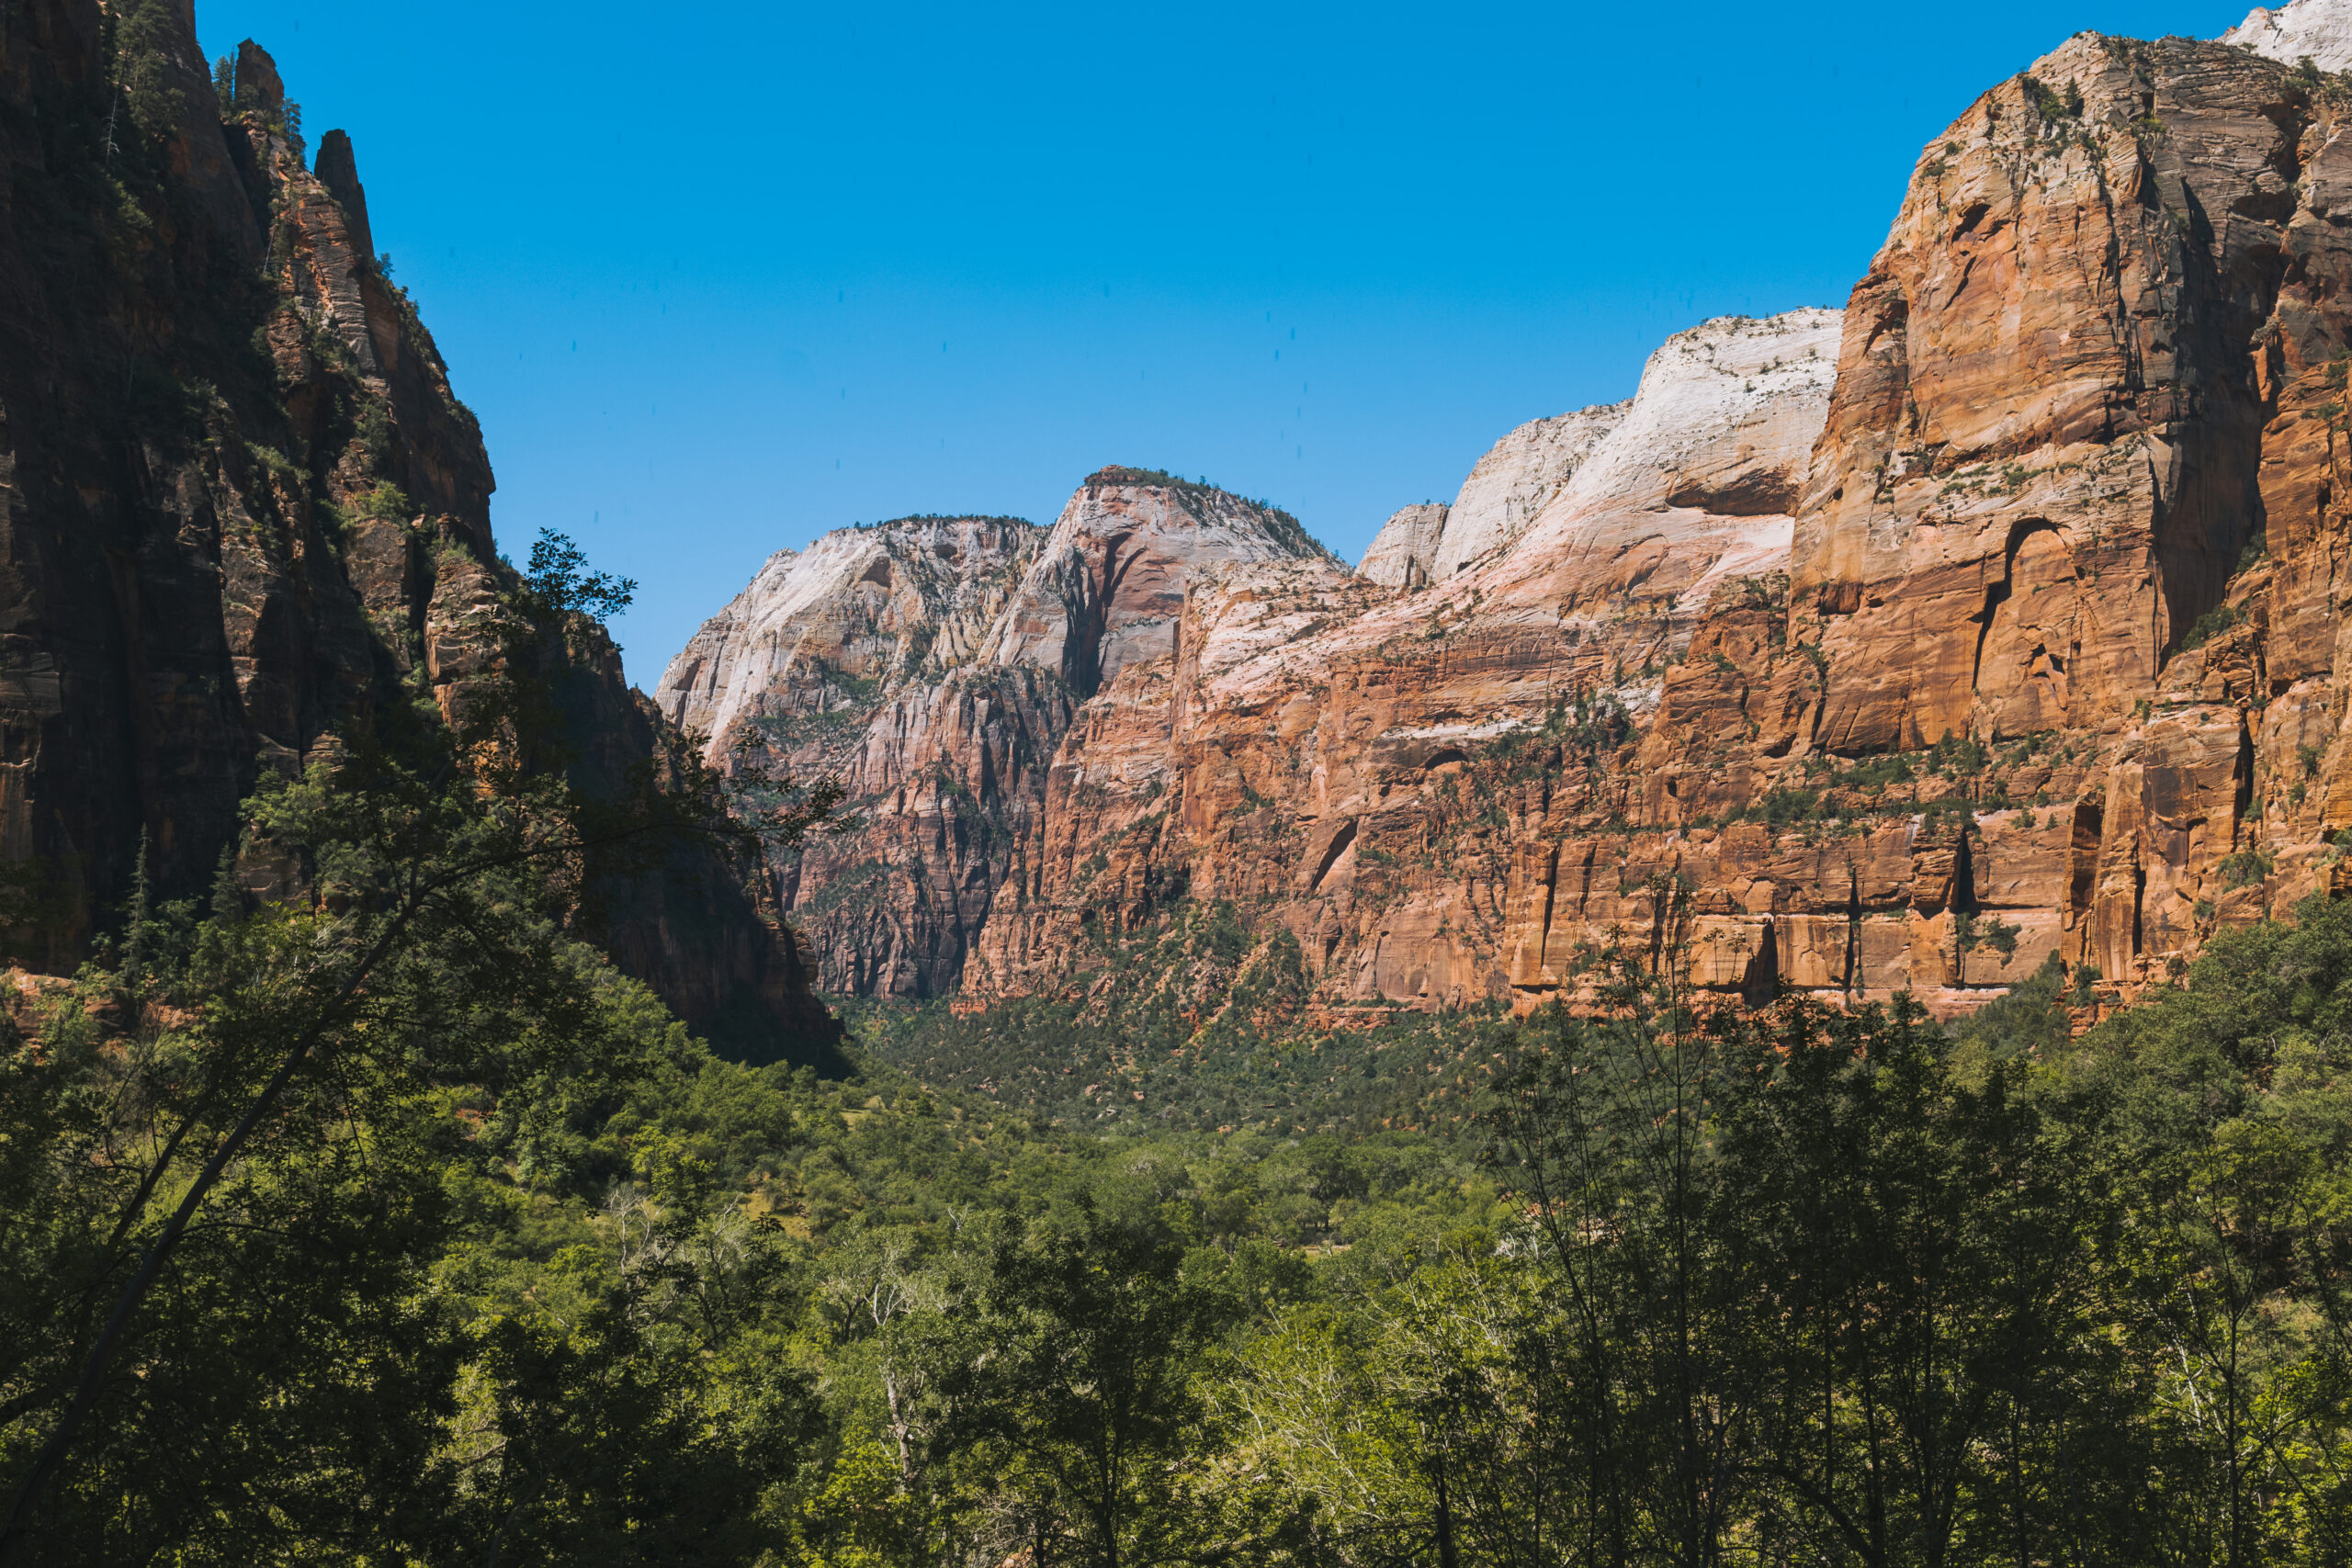
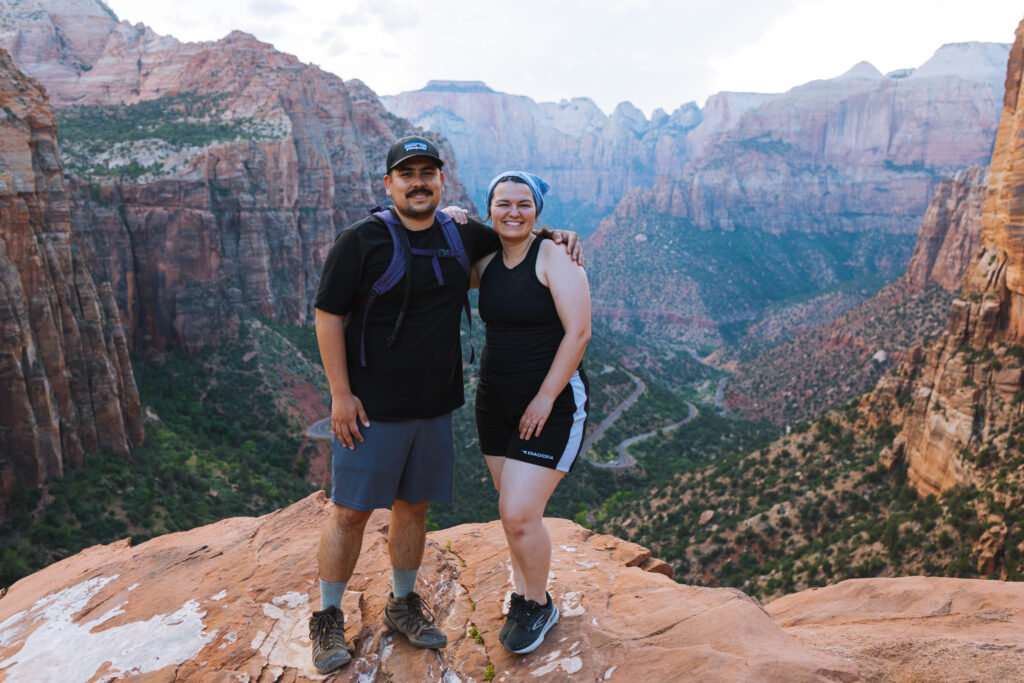
Zion Canyon Overlook Trail

I feel like we’ve said “our favorite” a lot in this post – but Zion Canyon Overlook might be our favorite view at Zion.
Hike this at or near sunset. It’ll make the view so much better.
This trail starts up on the Zion-Mount Carmel Highway. This is a 1 mile round-trip hike that is considered very easy.
The hardest part is finding parking along the road.
If you’re coming from the South Entrance (meaning driving north-east), try to park in the little lot just past the Zion Tunnel.
Otherwise you’ll have to turn around and park along the side of the road.
Once you’re hiking, the trail takes you through rocky stairs, a rickety metal bridge, and eventually out to an overlook of the canyon.
The views were absolutely stunning.
There were plenty of places to roam around, get different angles, and contemplate how far down the drop is (hundreds of feet, I’m sure).
Get as close to the edge as you feel comfortable and take in the sweeping views.
Weeping Rock

The Weeping Rock trail starts on Shuttle Stop 7 for Weeping Rock.
The trail is 0.3 miles round trip, but is steep (and wet) in some areas.
The trail takes you up to a giant slab of rock that typically has water flowing from it (hence the name weeping rock).
You can climb up a set of metal stairs to stand right underneath the rocks. The stairs and area can get quite slippery because of the water.
But it’s a very interesting experience and a short, easy hike that can break up your day!
One Day in Zion National Park
You most definitely need more than one day at Zion, but you’re a busy person – we get it!
If we had one full day in Zion National Park, here’s how we’d spend it.
- Morning: Hike up to Angels Landing (or Scout Lookout if you don’t have a permit)
- Mid-day: Hike the Watchman Trail
- Late afternoon: Drive up to Zion Canyon Overlook for sunset
- Night: Explore Springdale, UT – dinner, drinks, and sweet treats.
Again, hard to do everything you want in one day at Zion, but it’s very possible.
The trick is to arrive early, pack everything you need (including extra food and water), and plan on lots of walking and hiking in one day.
You’ll most likely be exhausted, but it’ll be worth it to have seen the very best of Zion.
Final Thoughts: Zion National Park for Beginners
I think we doubted whether or not Zion would be worth it.
Just like any place that has great reviews, we were worried Zion would be overhyped.
And I’m glad to say we were wrong.
While it wasn’t our favorite park in Utah (hello Canyonlands!), it’s definitely a place we are glad to say we have visited.
The canyon walls are simply stunning as they rise all around you. All of the hikes lead to either really intriguing or delightful views.
And in our opinion, it’s one of the best logistically run parks we’ve ever visited. The bus routes, rangers, and signage were all very clear and easy to navigate.
Afterward, we headed to Bryce Canyon National Park to finish up our Utah Road Trip.
But our trip to Zion National Park definitely left a mark on us. We’ll always remember the giant canyon walls and the stunning red rocks all around.
We’ll definitely be back (and be more prepared).
Zion National Park was perfect for us beginners – and it will be for you too!